


LESSON 6
Optimizing Your Game's First Impression
13 min read
Intro
Like any product, service, or experience, Astrocade games often live and die by the quality of their first experience. It sounds obvious to say that games that “get to the fun part” faster tend to be more successful, but creators routinely underestimate this fact. This section is intended to change that kind of thinking.

TERM TO KNOW
“FTUE (First-Time User Experience)”
FTUE, or First-Time User Experience is as important a concept as TTF (and a closely related one as well).
Simply put, it refers to the user’s first impression of your game, from their literal first glimpses (a title screen, a loading bar, and so on) to their initial attempts at learning the core mechanic. Few aspects of your game’s design play a bigger role in determining whether the player stocks around than the FTUE.
This lesson will break down various do’s and don’t’s, but ultimately the job of any game’s FTUE is simple: get the player to the fun of the game as soon as possible.
If you take away nothing else from this lesson, remember this much.
By the way...
Before we get started, check out this video tutorial on the subject for a quick overview on the topic!
In-game tutorials
Tutorials are [hopefully!] the least fun part of your game. And even the best ones increase time-to-fun (TTF). Still, the difference between a good tutorial and a bad one can be huge, so let’s talk about how to make sure you get them right.
The three keys to a good tutorial
Good game tutorials are generally:
- Visual: They lean on visuals more than text. Everyone reads at a different speed and non-native readers may find it even more challenging. More importantly, reading a long passage of instructions is just a lot less engaging than, you know, playing.
- Interactive: The best tutorials guide the player to actually play in a way that teaches, as opposed to simply describing or demonstrating. Pointing out the score counter may not require any input from the user, of course, but wherever possible, encourage the player to do the thing you want them to understand.
- Contextual: They appear at both the place (onscreen) and time of the thing they’re describing. Rather than making the player read (and memorize) something in advance—which no one does! ever!—they appear exactly when and where the player needs it.
The dreaded "wall of text" tutorial
You might as well replace all this text with the phrase “Please don’t play my game.” It’s shorter and has about the same effect.
Given the previous slide, it should come as no surprise that the “wall of text” is about the worst possible way to kick off your game.
The reasons should hopefully be obvious, but:
- Playing games is fun. Reading lots of text is not.
- Excessive text raises language barriers, making your game less accessible to players who don’t read your language fluently.
- And just ask yourself: Even if someone wants to read it, how much are they likely to remember? Memorization isn’t realistic.
The rest of this section will demonstrate how you can retain the tutorials you want without burning players.
An example of an optimal in-game tutorial
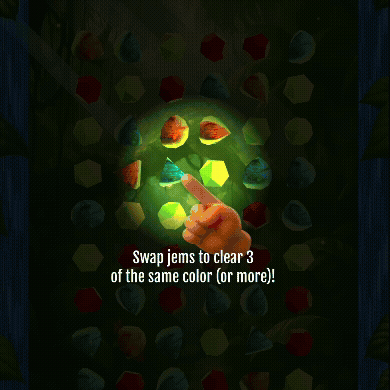
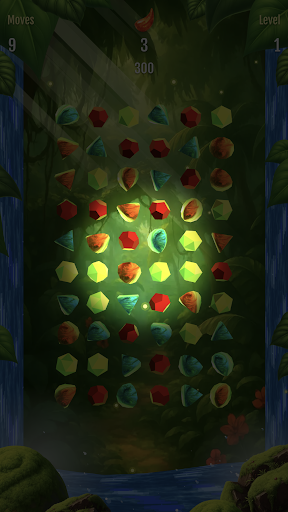
Here’s an example of a tutorial that embodies each of our desired qualities. It comes from Jungle Jems, a match-3 game I made.
It’s both visual and interactive, demonstrating the swipe gesture and then allowing the player to perform it themselves.
It’s also contextual, as it appears precisely when and where it’s relevant to the player. The spotlight effect goes a step further, keeping the game screen visible while focusing the player’s attention where it’s needed.
An example of an optimal in-game tutorial

The spotlight effect by itself: a darkened screen with a softly illuminated circular area.
The first step in creating this kind of tutorial is creating a reusable spotlight effect that can be used to highlight any part of the game.
The spotlight effect by itself: a darkened screen with a softly illuminated circular area.
The first step in creating this kind of tutorial is creating a reusable spotlight effect that can be used to highlight any part of the game.
The spotlight effect applied to a game screen.
Why “reusable”? This effect is a great example of a wish that you can use over and over. Games often have more than one tutorial, after all, and we’d rather reuse the spotlight effect rather than continually wishing for it.
The spotlight effect applied to a game screen.
Why “reusable”? This effect is a great example of a wish that you can use over and over. Games often have more than one tutorial, after all, and we’d rather reuse the spotlight effect rather than continually wishing for it.
Creating a Jungle Jems-style spotlight tutorial
We can get our spotlight tutorial effect off the ground with a wish along these lines:
Create a reusable spotlight effect for use in tutorials. It should darken the entire screen, except for spotlight-like radius around a specific thing. The effect should fade in and then fade out when done. Test it by putting a spotlight on the score (diameter = 1/4th the width of the screen) when the game starts until the user taps.
Let’s break this wish down with a bit of commentary, step-by-step:
“Create a reusable spotlight effect for use in tutorials.”
I start off by giving this effect a unique name (”spotlight effect”) and being sure to call it reusable. I want Astra to be ready to apply this to multiple tutorials, not just this one.
“It should darken the entire screen, except for spotlight-like radius around a specific thing.”
This is describing the basic effect itself. I use generic language like “a specific thing” to make it clear that the focal point of the tutorial will be different each time.
“The effect should fade in and then fade out when done.”
This is just a simple extra detail to make sure the screen smoothly darkens and returns to normal.
“Test it by putting a spotlight on the score (diameter = 1/4th the width of the screen) when the game starts until the user taps.”
I ask for a test tutorial immediately to evaluate the results. By calling it a “test”, I’m letting Astra know that this will probably be changed/removed.
Removing the test tutorial and creating a real one
Once I’m happy with the spotlight effect, I can tell Astra to remove the test. I expect Astra to know that the spotlight effect should be kept; it’s just the test that we’re getting rid of:
Immediately upon displaying the first level grid, find any pair of jems that, when swapped, will create a row of exactly 3 of the same color (a match 3). Center the spotlight here (centered between the two jems to swap), wide enough to include both of them.
I now want to apply this effect to create my first real tutorial. My goal for the first tutorial is to explain the match-3 swipe motion on an animated demonstration, so I want the spotlight to appear wherever a match 3 can be achieved with one swipe, allowing the player to score an easy W in the process. This is a bit tricky, though, because the grid is generated randomly for each level. So rather than specify a location on screen, I instead have to tell Astra what to look for.
Finally, I want to make the tutorial to provide an animated guide for the player to repeat. I did this with two main wishes:
Great! Now, after the spotlight appears, fade on text below the spotlight that says "Swap jems to match 3 in the same color!" Also fade on a dotted white 3px line. The line should pass through both jems in the pair to be swapped.
Now, create a finger point icon with the index finger pointing to the upper left of the image. Fade this icon in along with the text and dotted line. It should appear pointing at the starting point of the line, smoothly move to end point, fade out, then repeat the process.
Alternative tutorial styles
The spotlight tutorial is a great effect, but it’s only one among many effective options.
Flipper: WATCH OUT, from creator @N0x, is an excellent example of an in-game tutorial for a fast action game that tells the player what to do without compromising speed or time-to-fun:
Rather than using a spotlight effect, which would be distracting in a game that requires fast reflexes, it zooms in the camera on the player while keeping the game going. This helps the user focus on the right area of the screen without the tunnel vision effect.
What about repeat players?
What about players who have already played your game and don’t need or want to go through it again? Adding a skip button is as easy as a wish along these lines:
Whenever a tutorial appears, include a “Skip” button beneath it. If the player clicks this, immediately exit the tutorial and do not show ANY more.
Persistently save whether or not a player has completed the tutorials, and skip them for any players
Alternatively, It’s also possible to automatically save the player’s progress through the tutorials with something like this.
Which route you chose is up to you, but keep the following in mind:
Method
Pros
Cons
Skip Button
Keeps control in the player’s hands at all times. Players who might want to refresh themselves can easily redo the tutorial.
Requires at least one extra tap every time the player plays the game.
Persistently Saved Progress
Elegant and automatic. Ensures the least amount of friction.
More error prone, especially when a player isn’t logged in. Also offers no built-in way to replay the tutorial when desired.
One last thought on tutorials
Now that you know how to make tutorials, the most important question you can ask is when to do so—because too many tutorials can be as big a problem as too few.
Focus on unique features!
Tutorials should generally be reserved only for aspects of your game that are unique, or at least rare. Universal game mechanics that we’ve all seen a thousand times probably don’t need to be spelled out step by step. (For instance, my match-3 example is actually a bad one, as most people know how a match-3 works at this point in human history.)A bit of mystery can be fun!
Players love the feeling of discovery, so consider leaving some aspects of your game—especially anything that’s not life-and-death—deliberately unexplained, allowing the player to figure it out themselves.Pre-game content
If the object of any game’s FTUE is to deliver a fun experience as soon as possible, any step that may come first should be heavily scrutinized and removed if not deemed 100% essential. This includes any storytelling intro content, logo and title screens, and menus and options that might appear at the start of the game. All of these things, to varying degrees, extend the TTF. Whether that wait is justified must be answered on a case-by-case basis.
Suggestion: Ask as little as possible of first-time players
Bro am I playing a game or logging into my bank
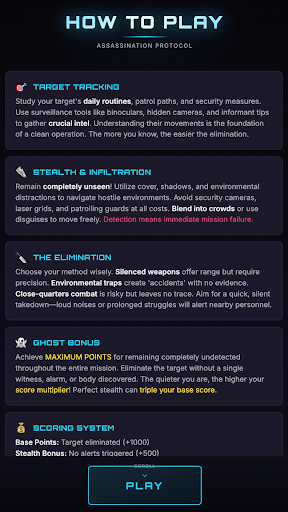
Here’s an example of a first impression that far too many Astrocade games make: a cryptic menu screen that presents a first-time player with options they don’t yet understand. This is a problem for two reasons:
- No context: They haven’t played your game yet, and simply won’t understand what much of your menus, options, and prompts mean.
- No fun: Players are after gameplay, and excessive intro menus simply delay it.
Ask yourself: is it essential that a first-time player pick a game mode, or a difficulty level, or the level itself? Would it be easier to simply drop them into the game with default settings, then surface a menu to change those settings after they have a frame of reference and have shown interest?
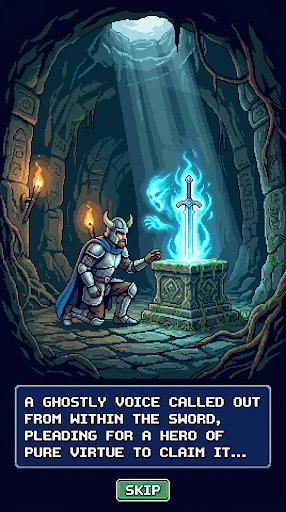
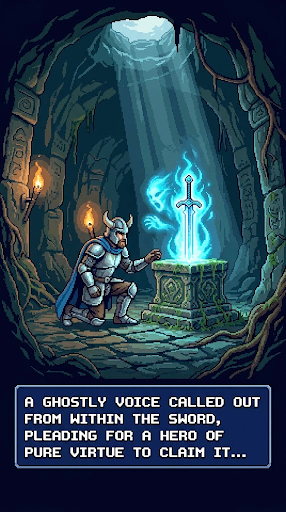
Bro am I playing a game or logging into my bank
Here’s an example of a first impression that far too many Astrocade games make: a cryptic menu screen that presents a first-time player with options they don’t yet understand. This is a problem for two reasons:
- No context: They haven’t played your game yet, and simply won’t understand what much of your menus, options, and prompts mean.
- No fun: Players are after gameplay, and excessive intro menus simply delay it.
Ask yourself: is it essential that a first-time player pick a game mode, or a difficulty level, or the level itself? Would it be easier to simply drop them into the game with default settings, then surface a menu to change those settings after they have a frame of reference and have shown interest?
Suggestion: Make story/intro content skippable
Although similar, one of these cinematic intros absolutely sucks
Even casual games can benefit from backstory, theatrics, and other introductory material. But that doesn’t change the fact that a platform like Astrocade is popular among casual gamers looking for a quick dopamine rush, which means many of your potential players aren’t going to have the patience for a narrative deep dive—especially at the very start of the game..
That’s why, if you’re going to front-load your game with a cinematic intro sequence, you’re strongly encouraged to include a skip button that lets players jump straight to the gameplay if they’re so inclined.
Warning: Logos and title sequences can incresae download times

This may look awesome, but it’s going to add about nine minutes to your TTF for half the world’s population
We encourage creators to add a personal logo or title screen to your game. When tastefully done, they’re a fun way to show your pride in your work and remind users that Astrocade games are made by passionate creators worth remembering.
However, resist the temptation to make these overly complex, especially when it comes to video or animation. As cool as they may look, animated intros add a huge amount of extra download at the worst possible moment. We’ll cover the ins and outs of download time optimization in the next lesson, but for now, remember that overloading your intro can be a great way to boost your TTF and cause users in low-bandwidth areas–much of the world!—to bail early.
Diagnosing FTUE issues
Now that you have a better idea of what an optimal FTUE looks like, how can you determine whether your game is performing accordingly?
If you haven’t yet familiarized yourself with the Creator Hub, FTUE evaluation is a great reason to check it out.
Your game’s Play Duration graph breaks down how long your players play your game before ending the session across different ranges. Seeing too many sessions with lengths in the 0-10s or 10-30s range (relative to longer sessions, like 30-60s or 1-2m) is a strong indication that something is turning them away early on.
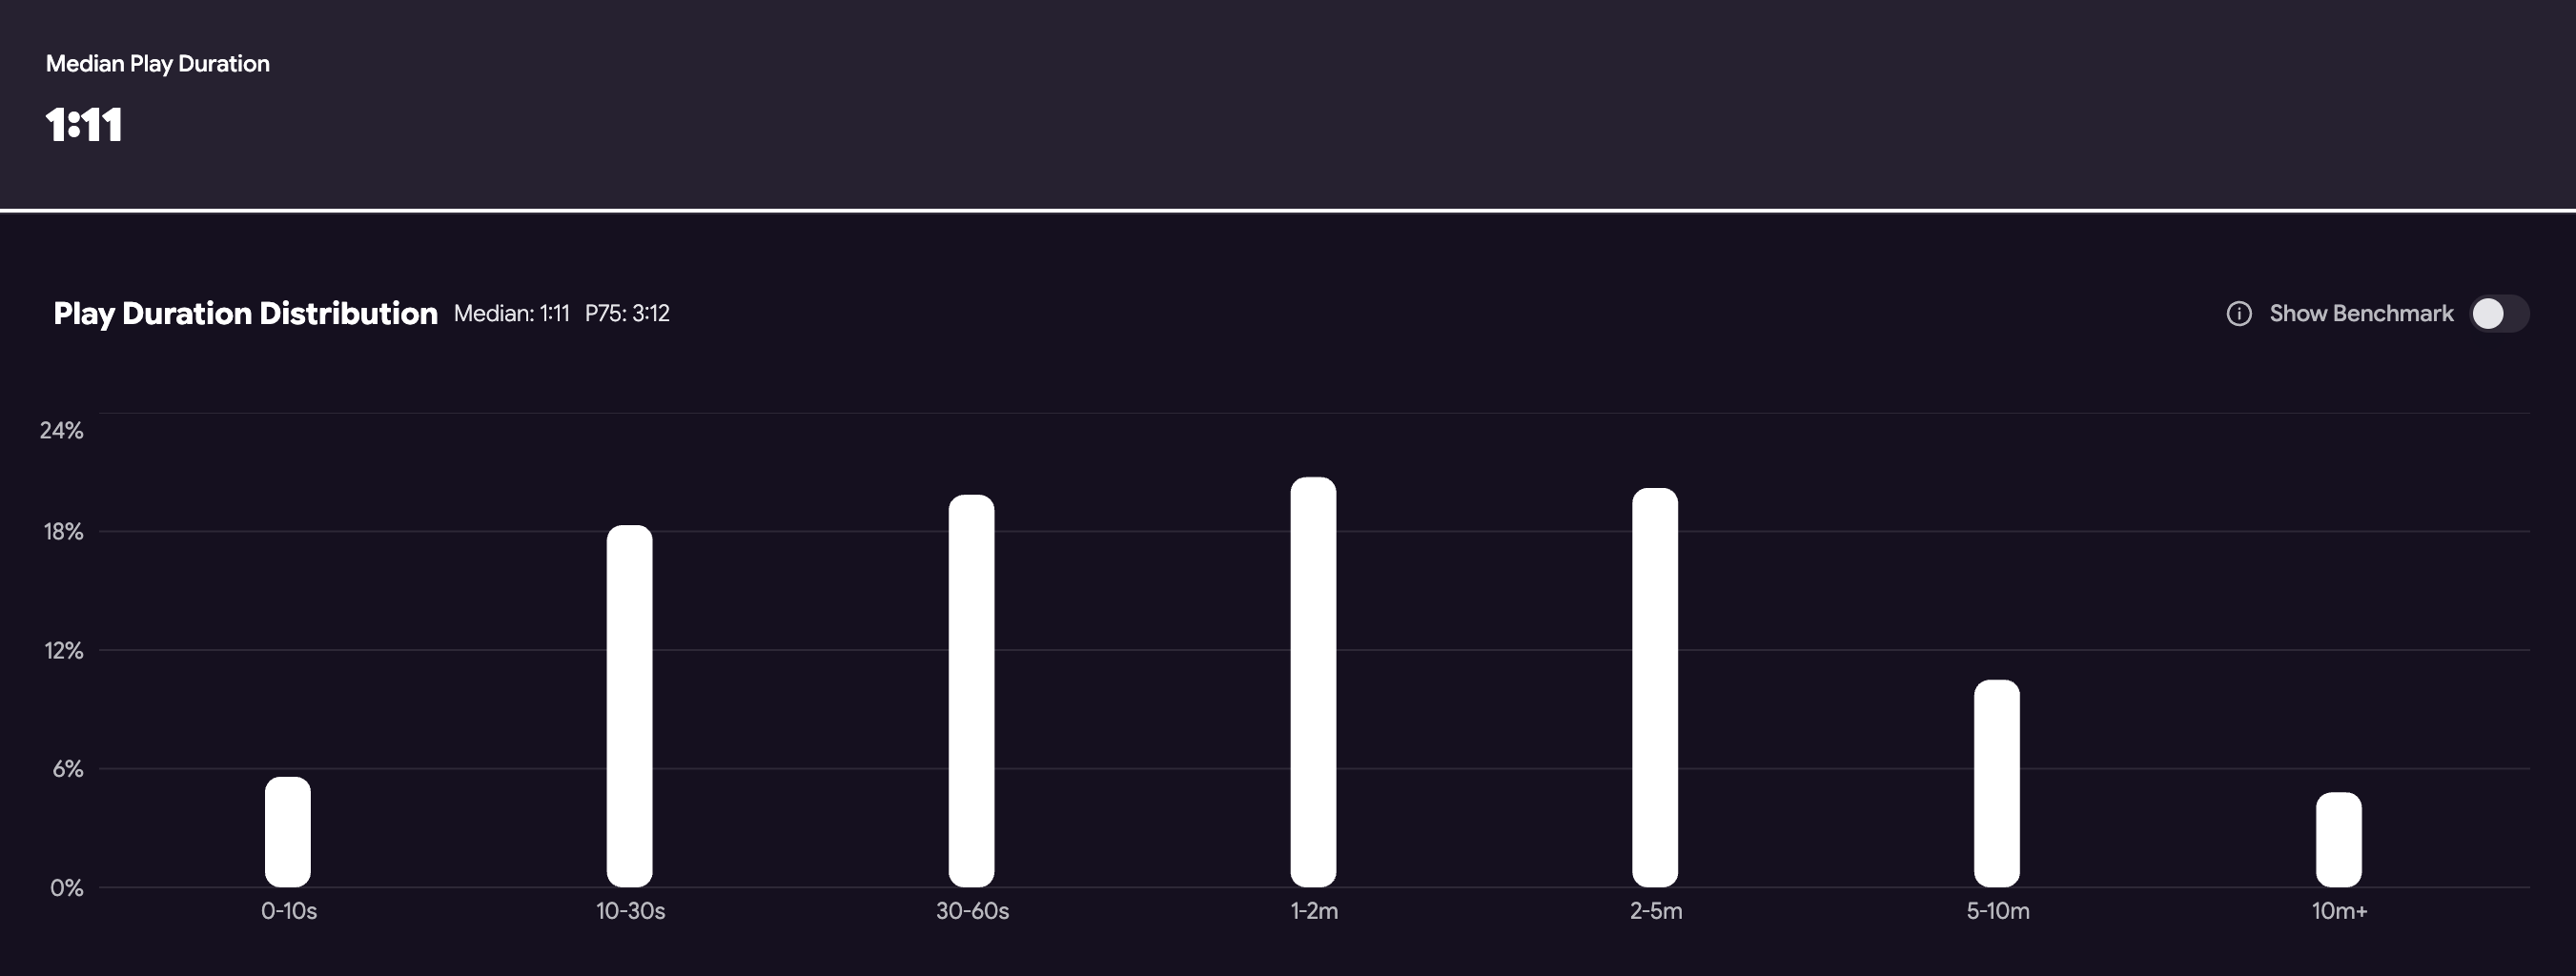
Good games have minimal plays in the 0-10s range and, ideally, relatively few in the 10-30s range. This game, for instance, doesn't appear to have a huge FTUE (0-10s) problem, but has lots of room to improve within the first 30 seconds.

Onward, cadet! To the exercises!
Exercise
Define (and defend!) your FTUE
Click here
The design of your game’s FTUE includes many of the most important decisions you’ll make as a creator.
As the next step in your game’s design, use what you’ve learned to propose an FTUE optimization strategy for your own game as a new section in your design document. Don’t yet worry about wishing for anything—just plan it out and think in terms of your ideal outcome.
Quiz
Lesson Recap
Click here
Finally, to complete this lesson, check out the linked form for a simple recap quiz that tests your knowledge of this lesson’s most important concepts.
Don’t worry, it’s easy (and open book 👀)!